Create a Windows XP Embedded image
A Windows XP Embedded image is created a little differently from the images under the Disk Images section. The Windows XP Embedded Target Designer software produces a folder containing Windows, not a disk image/installable media.
This article will guide you through building that folder and turning it into a WiNspire bootable hard disk.
Requirements
-
QEMU
-
a Windows XP Pro VM - a beginner friendly walkthrough can be found here
-
Syslinux.
1. Install Windows XP Embedded SP2
Install Windows XP Embedded SP2 inside your WinXP Pro VM. Use the installer to install the Windows XP Embedded development tools and component database, then apply the SP2 update and restart Windows.
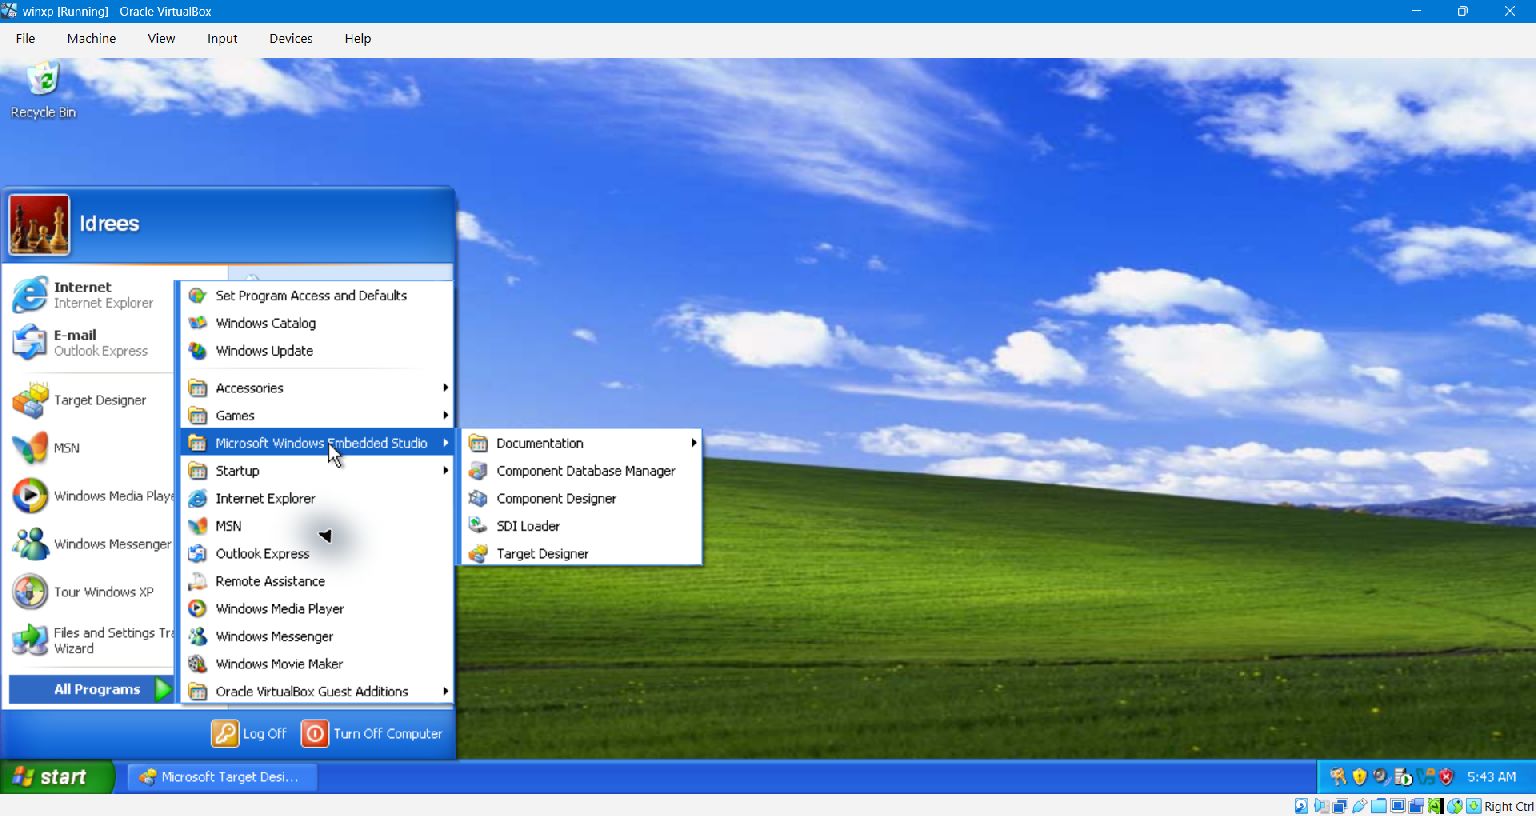
You should now have:
- Component Designer
- Component Database Manager
- Target Designer
under:
Start > All Programs > Microsoft Windows Embedded Studio
2. Create a new configuration
Open Target Designer and choose File > New. Give it a nice name! Download the devices.pmq and copy it over to the XP VM. Choose File > Import, select the downloaded file and click Start to add the hardware components
Add a desktop
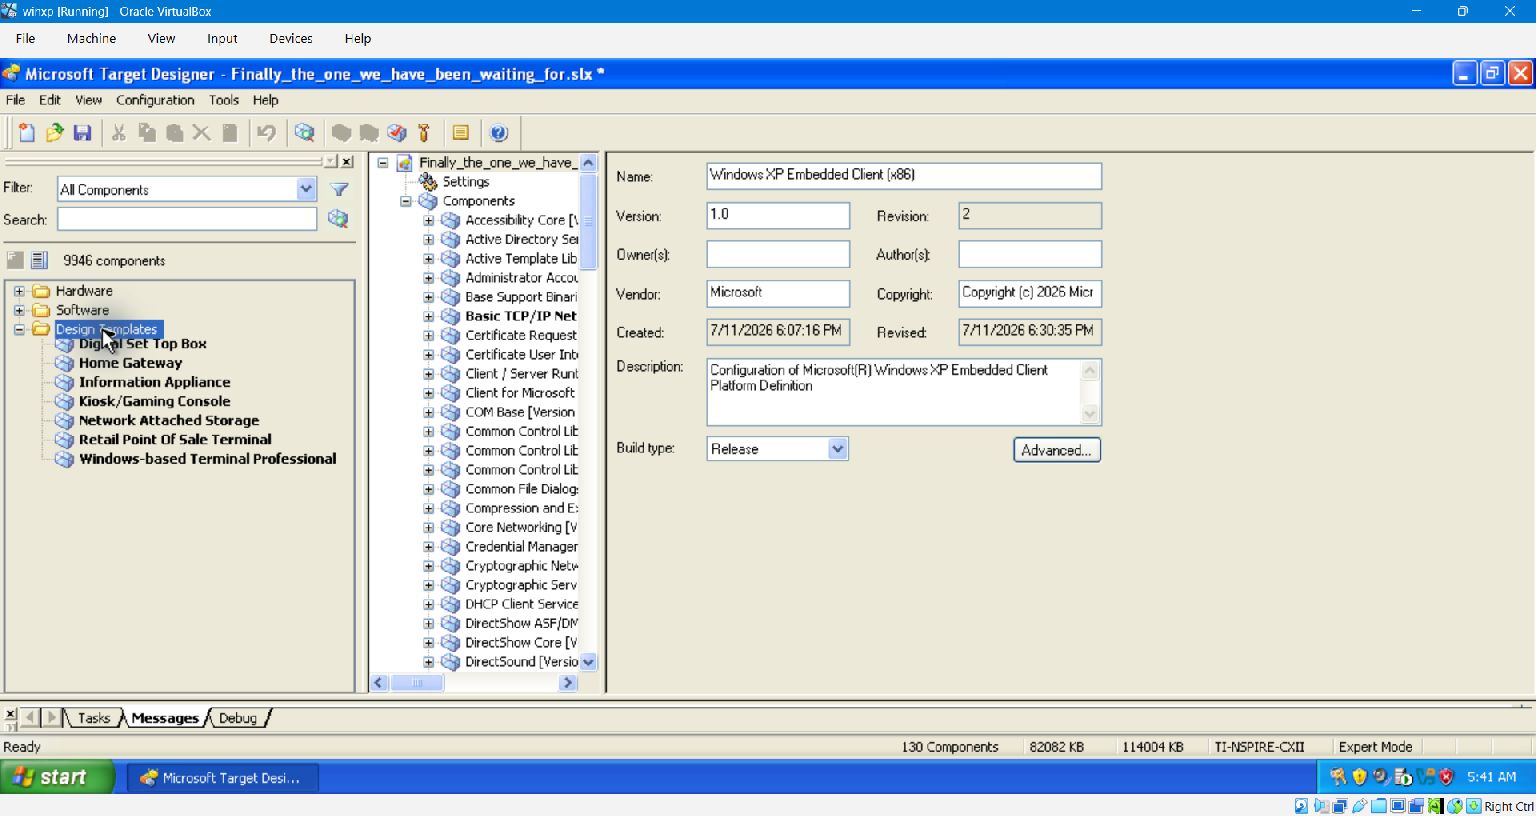
Add the Windows-based Terminal Professional design template as the starting point for a normal Explorer-based XP desktop.
Ensure the following components are present:
- Standard PC
- PCI
- IDE storage
- FAT/FAT32
- NT Loader
- Windows Logon
- Explorer Shell
- User Interface Core
- VGA display
- PS/2 keyboard
- PS/2 mouse Do not add any ACPI or I/O APIC components.
Under Target Device Settings, set the boot and system drive to C:.
Use multi(0)disk(0)rdisk(0)partition(1) as the Boot ARC path.
3. Resolve dependencies
Go to Configuration > Check Dependencies and resolve every dependency reported in the Tasks tab. Run Check Dependencies again and repeat till there are no unresolved tasks. Once the dependecy tree is clean, save the configuration.
Optional: Luna, Bliss and desktop programs
XP is not XP without its distinctive visual style and wallpaper. Also just a blank desktop is no fun for a demonstration! Before building the image you can add the Themes and Luna visual style components. You will need to copy Bliss.bmp over from a Donor XP image, along with program exes and their dlls.
4. Build runtime
Go Configuration > Build Target Image. Set build type as release and specify the output directory. Click build to build the image. Once done, navigate to the output directory and verify if the output contains the following:
boot.ini
ntdetect.com
ntldr
weruntime.ini
WINDOWS\
Configure boot.ini
Configure the boot.ini in the output folder to:
[boot loader]
timeout=0
default=multi(0)disk(0)rdisk(0)partition(1)\WINDOWS

[operating systems]
multi(0)disk(0)rdisk(0)partition(1)\WINDOWS="Microsoft Windows XP Embedded" /fastdetect
Now it's time to actually create the disk image.
5. Create a temporary VHD
Create a temporary VHD on your host machine..
qemu-img create -f vpc xpe.vhd 1G
...and attach it to the Windows XP development VM as a second IDE disk.
qemu-system-i386 -machine pc,accel=tcg,acpi=off,hpet=off -cpu pentium -smp 1 -m 512 -drive file=xp-dev.img,format=raw,if=ide,index=0 -drive file=xpe.vhd,format=vpc,if=ide,index=1 -vga std -nic none -boot c
6. Partition and format the XPe disk.
Inside the VM, format the newly attached disk as FAT32 and mark the partition as Active.
The below commands assume the drive was assigned the drive letter D and the output folder containing the runtime is XPE-output
7. Copy the runtime over.
Copy the Target Designer output to the newly formatted disk:
xcopy C:\XPE-output\* D:\ /E /H /K /Y
8. Install Syslinux
Extract the syslinux distribution inside the XP VM. For Windows XP you need to use the bios\win32\syslinux.exe executable.
Copy these BIOS modules from the Syslinux distribution to the root of the freshly formmated disk.
bios\com32\chain\chain.c32
bios\com32\lib\libcom32.c32
bios\com32\libutil\libutil.c32
Create syslinux.cfg in the root of the freshly formatted disk with the following content:
DEFAULT xpe
PROMPT 0
TIMEOUT 1

LABEL xpe
    COM32 chain.c32
    APPEND ntldr=/ntldr
Open an Admin Command Prompt, change to the Syslinux bios\win32 directory, and install Syslinux.
syslinux.exe --install --mbr --active D:
This will write the Syslinux boot sector, install the loader files , write Syslinux MBR code and mark partition as active.
After the command completes, shutdown the VM normally and detach the VHD from the VM.
9. Convert the VHD to a WiNspire compatible image.
On the host machine (assuming xpe.vhd is your vhd and xpe.img is your WiNspire compatible disk.):
qemu-img convert -f vpc -O raw xpe.vhd xpe.img
10. Run First Boot Agent
Boot the raw image in QEMU first.
qemu-system-i386 -machine pc,accel=tcg,acpi=off,hpet=off -cpu pentium -smp 1 -m 512 -drive file=xpe.img,format=raw,if=ide,index=0 -vga std -nic none -boot c
Windows XP Embedded will start First Boot Agent. The FBA configures the runtime and will restart the VM several times. Let it run its course. Once Windows reaches the desktop, you can shut it down normally.
Congratulations! 🎉 The XPe image is now ready for WiNspire.